Rock types, faults, old workings, creeks and LiDAR: how to stack five map layers to work out where gold is worth looking for, shown at Adelong NSW on the new Dig Here map.
No single map layer finds gold. Not the geology, not the old workings, not the LiDAR. Each one answers a different question, and it is where the answers line up that is worth a look.
That idea is behind the new look of the Dig Here map, which went live this week. We call it where data meets the dirt. This post walks through five layers in the order we would switch them on, using Adelong in southern New South Wales as the example. Adelong has been a gold town since the 1850s, so there is plenty on the map to read.
1. Start with the rock
Gold starts in hard rock, so start there. Switch on Rock types and the map colours the ground by what it is made of. At Adelong the big pink area is granite.
Gold likes granite country: along its edges, and along the cracks running through it. When a body of granite pushes up and cools, it heats and breaks the rock around it, and hot fluids move through the breaks. The granite itself cracks too. Those are the places gold gets left behind.
2. Add the faults
Now switch on Faults and quartz veins. Faults are the cracks gold-bearing fluids travelled along, leaving quartz veins behind. On the map they are the red lines.
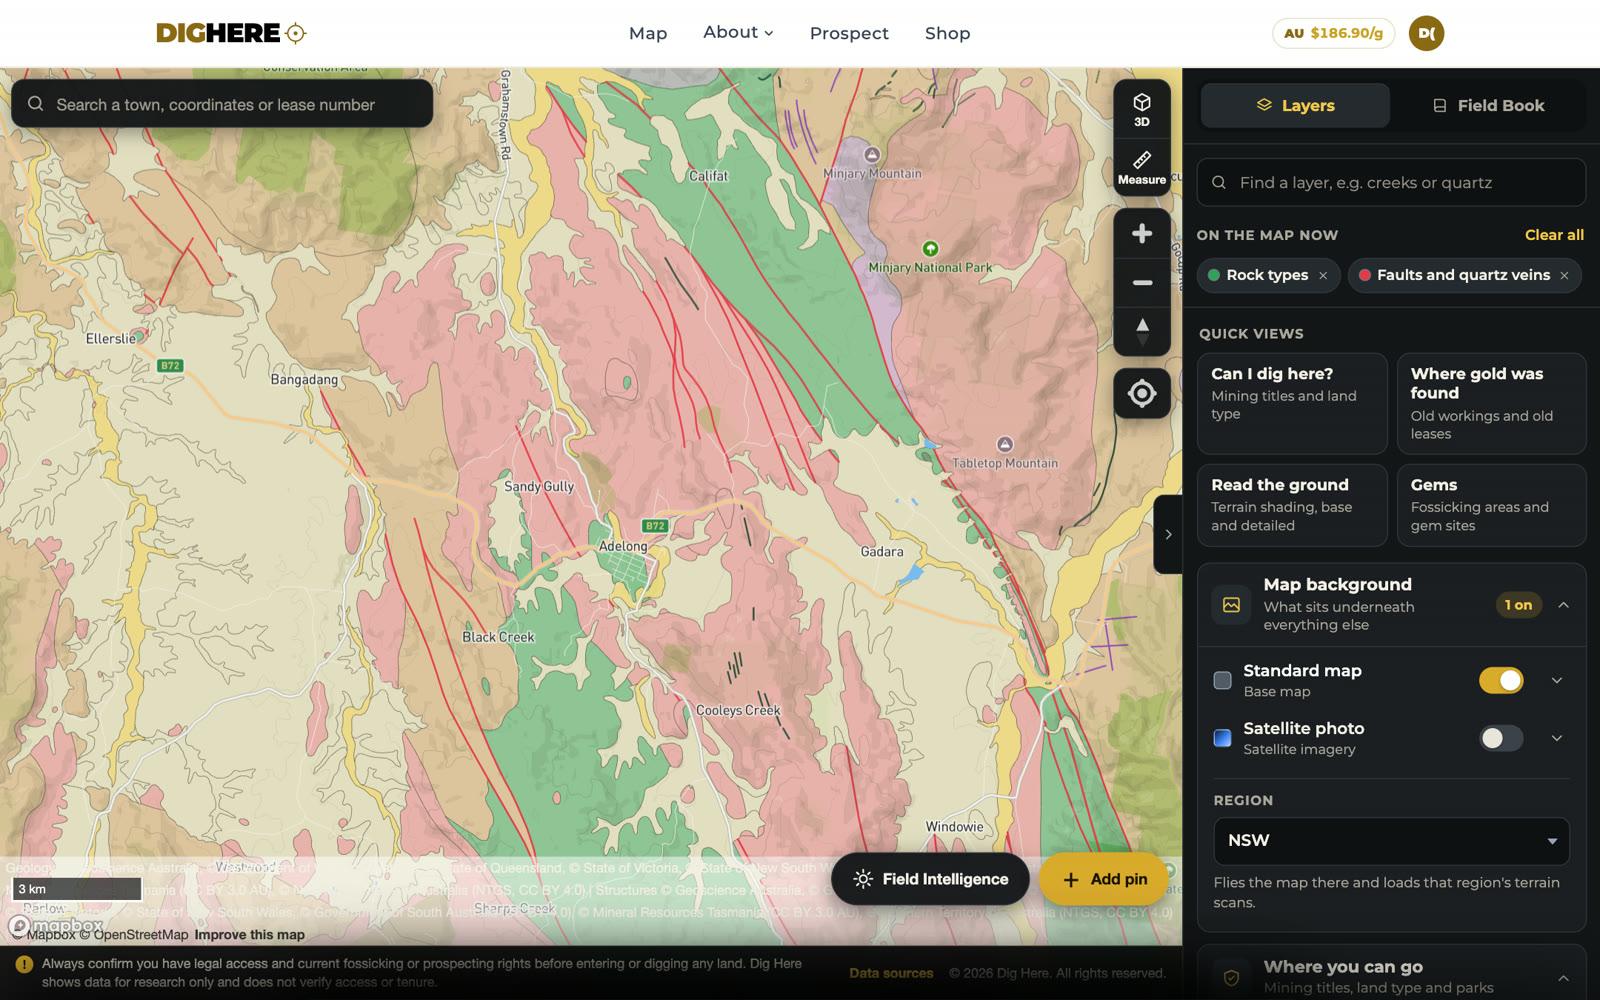
Look at the direction they run. At Adelong the faults all trend the same way, roughly north-west to south-east. That trend matters, because the reefs tend to follow it. Once you know the trend, you know which way to walk.
3. Now the old workings
The old-timers did the hard prospecting for us, on foot, with a pick. Every shaft, pit and tunnel they left is a record of where they found something worth digging for. Switch on Old gold workings and each orange dot is one that a government geologist has recorded.
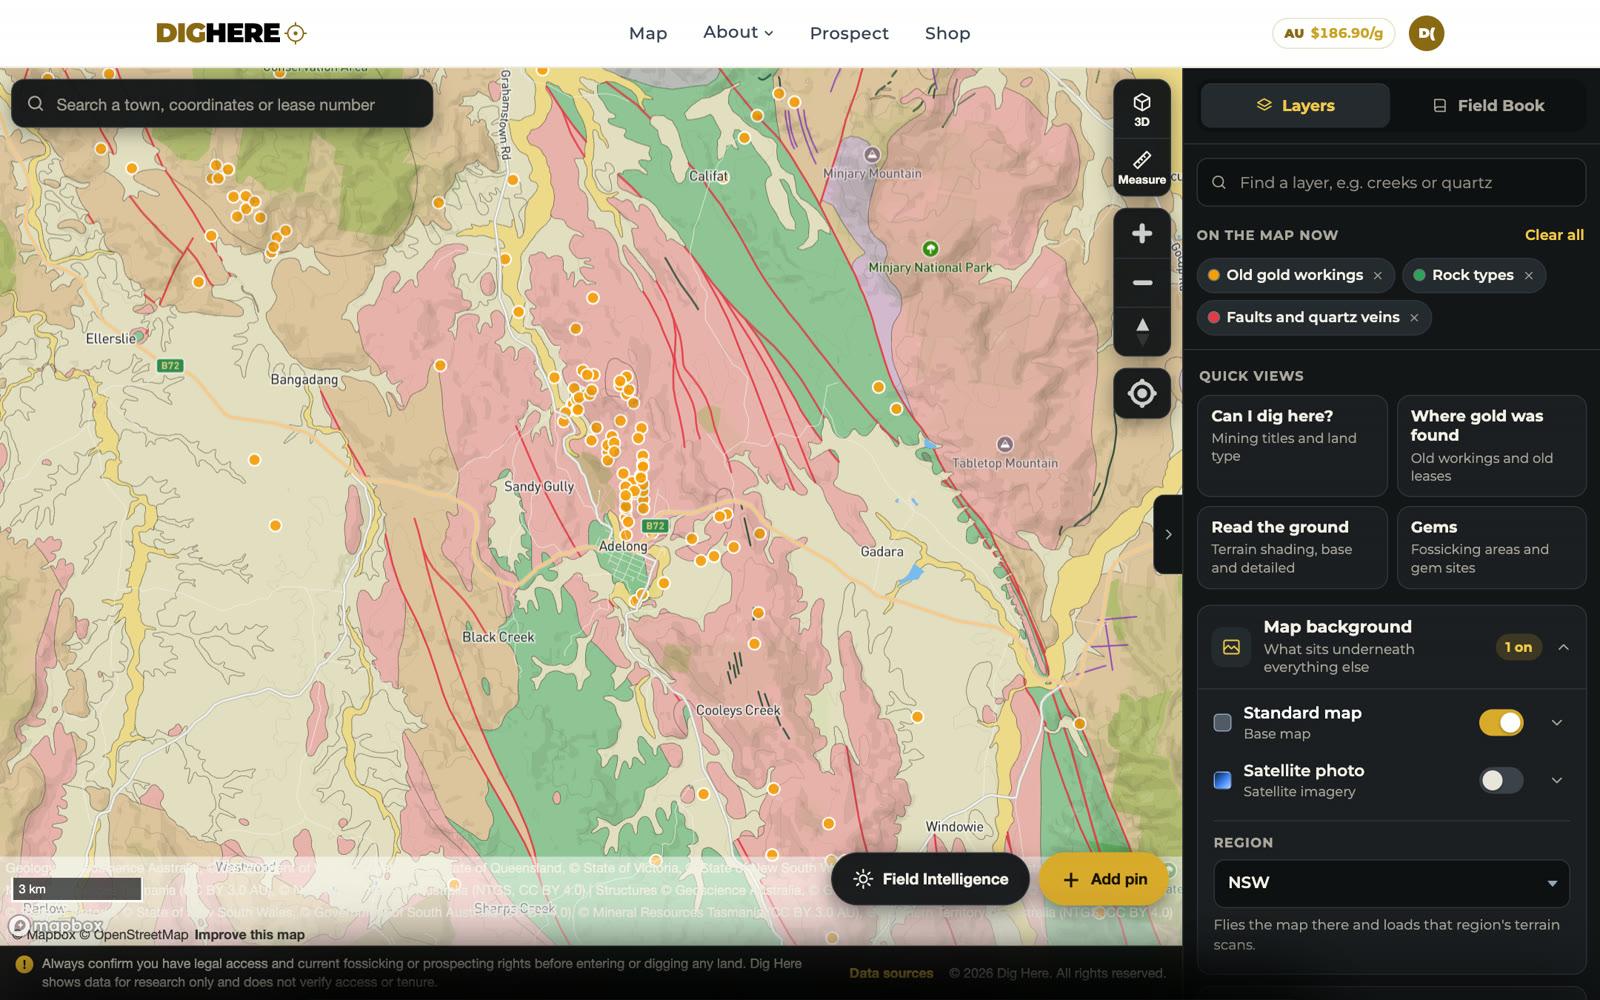
At Adelong the old reefs run in a line through the granite, on the same trend as the faults. That is three layers telling the same story: the right rock, cracks through it, and miners who followed those cracks for decades.
It also shows where they did not dig. Follow the same trend past the last working, or look for the same rock and the same kind of fault a few kilometres away, and you are thinking like a prospector.
4. Follow the creeks
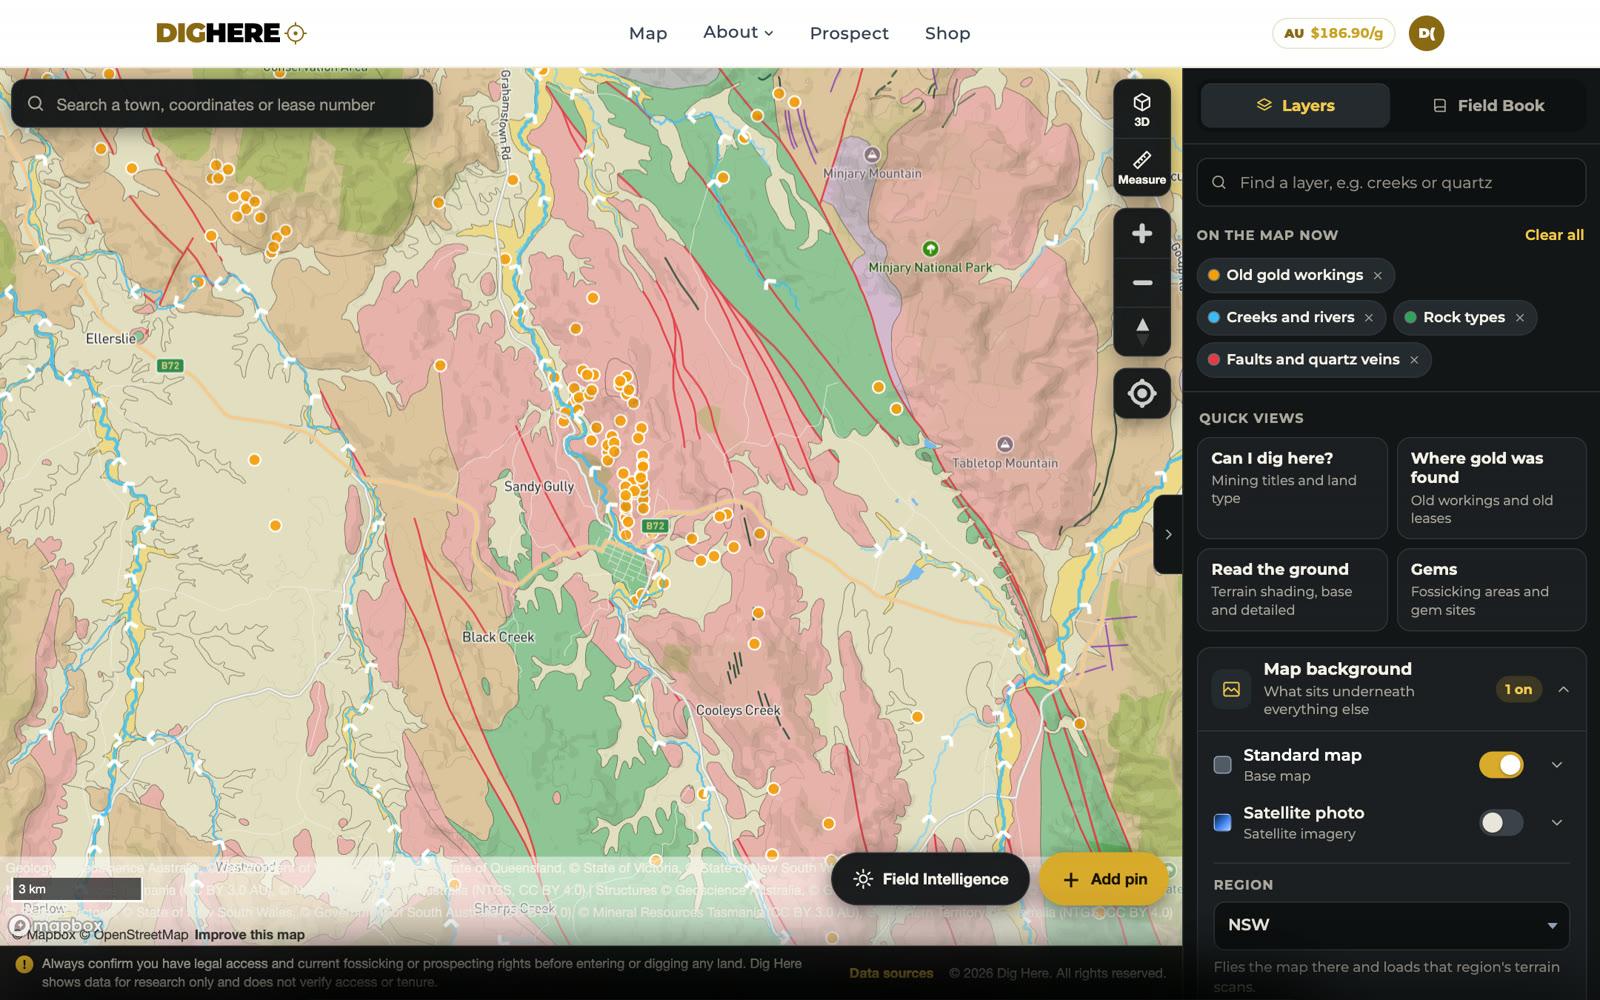
Most of us are not sinking shafts. We are panning, sluicing and detecting, which means we want the gold that has already left the reef. Gold that weathers out of a reef ends up in the gully below. It is heavy, so it does not travel far before it settles.
Switch on Creeks and rivers. The arrows show which way each one flows. Find the workings, then follow the water downhill from them. The first gullies and the first bends below a line of reefs are where the old alluvial diggers went, and where there is still gold in the ground they missed.
5. Read the ground itself
The last layer is the ground. LiDAR is a laser scan taken from an aircraft. It strips the trees away, so you can see every gully and bench, along with things you would walk straight past in the scrub: old water races, mullock heaps, shallow diggings and the dry channels where a creek used to run.
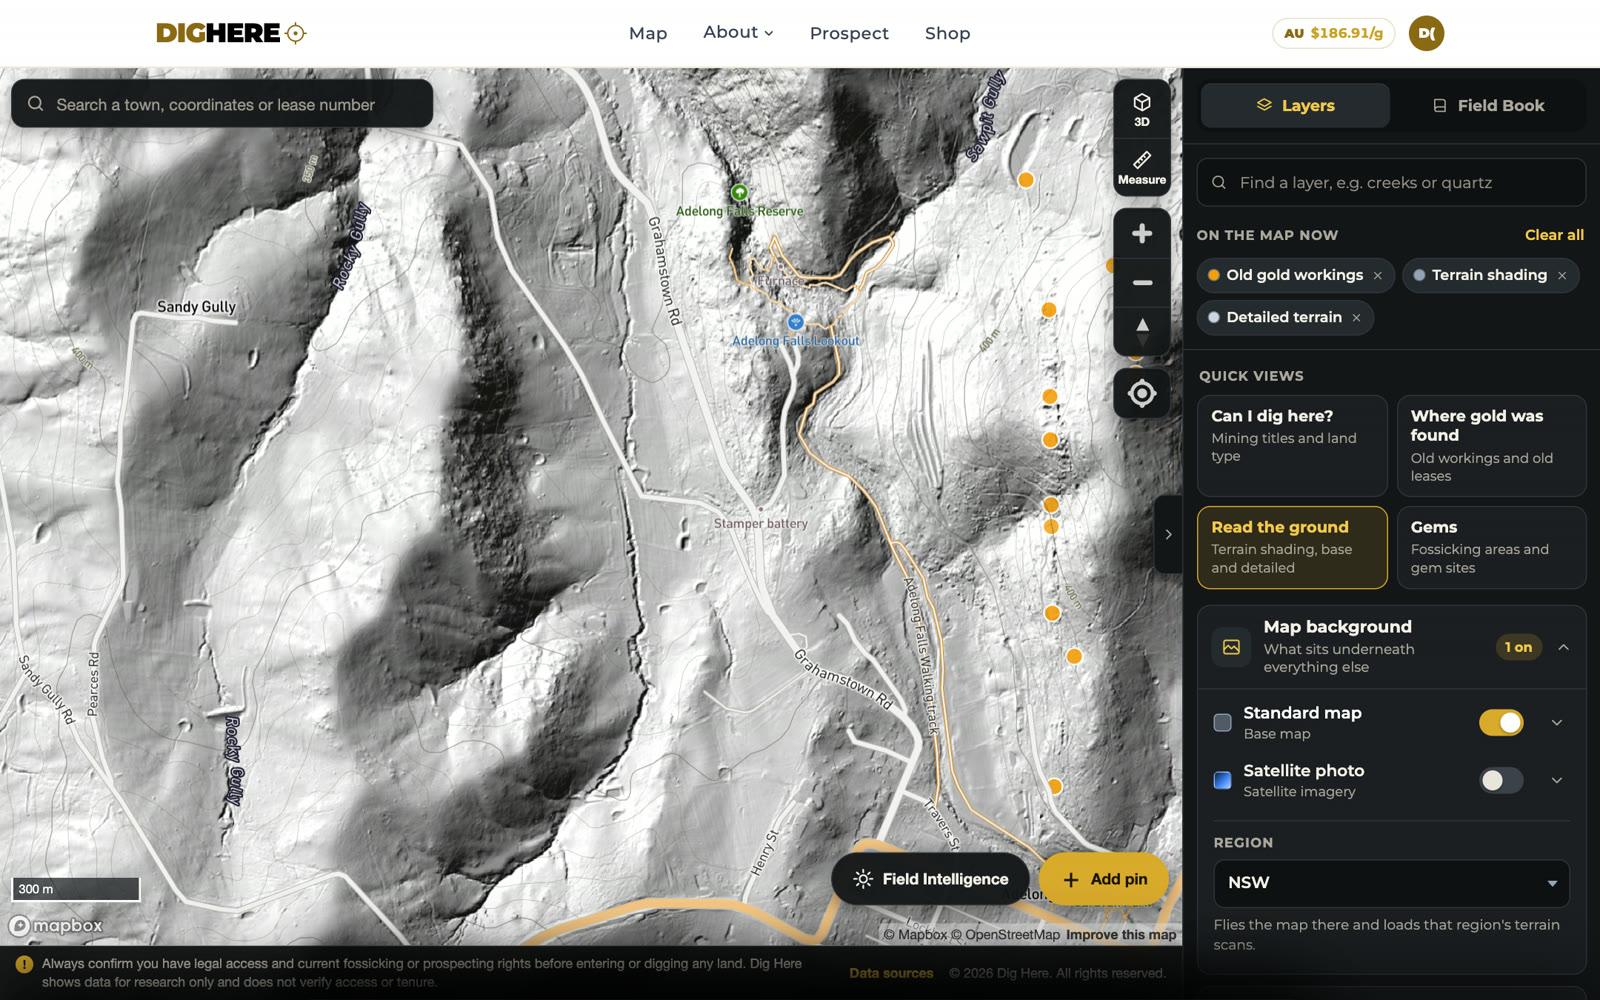
Choose Read the ground in the quick views and the terrain layers switch on together. We have detailed LiDAR over many goldfields but not everywhere, so where there is none the map falls back to the best terrain shading available.
Then ask the question that matters: can I dig here?
A promising spot is no use if you are not allowed on it. Before you go, tap the map. It checks the land type and every mining title at that point, and gives you a plain yes or no, the reason, and what you need to carry.
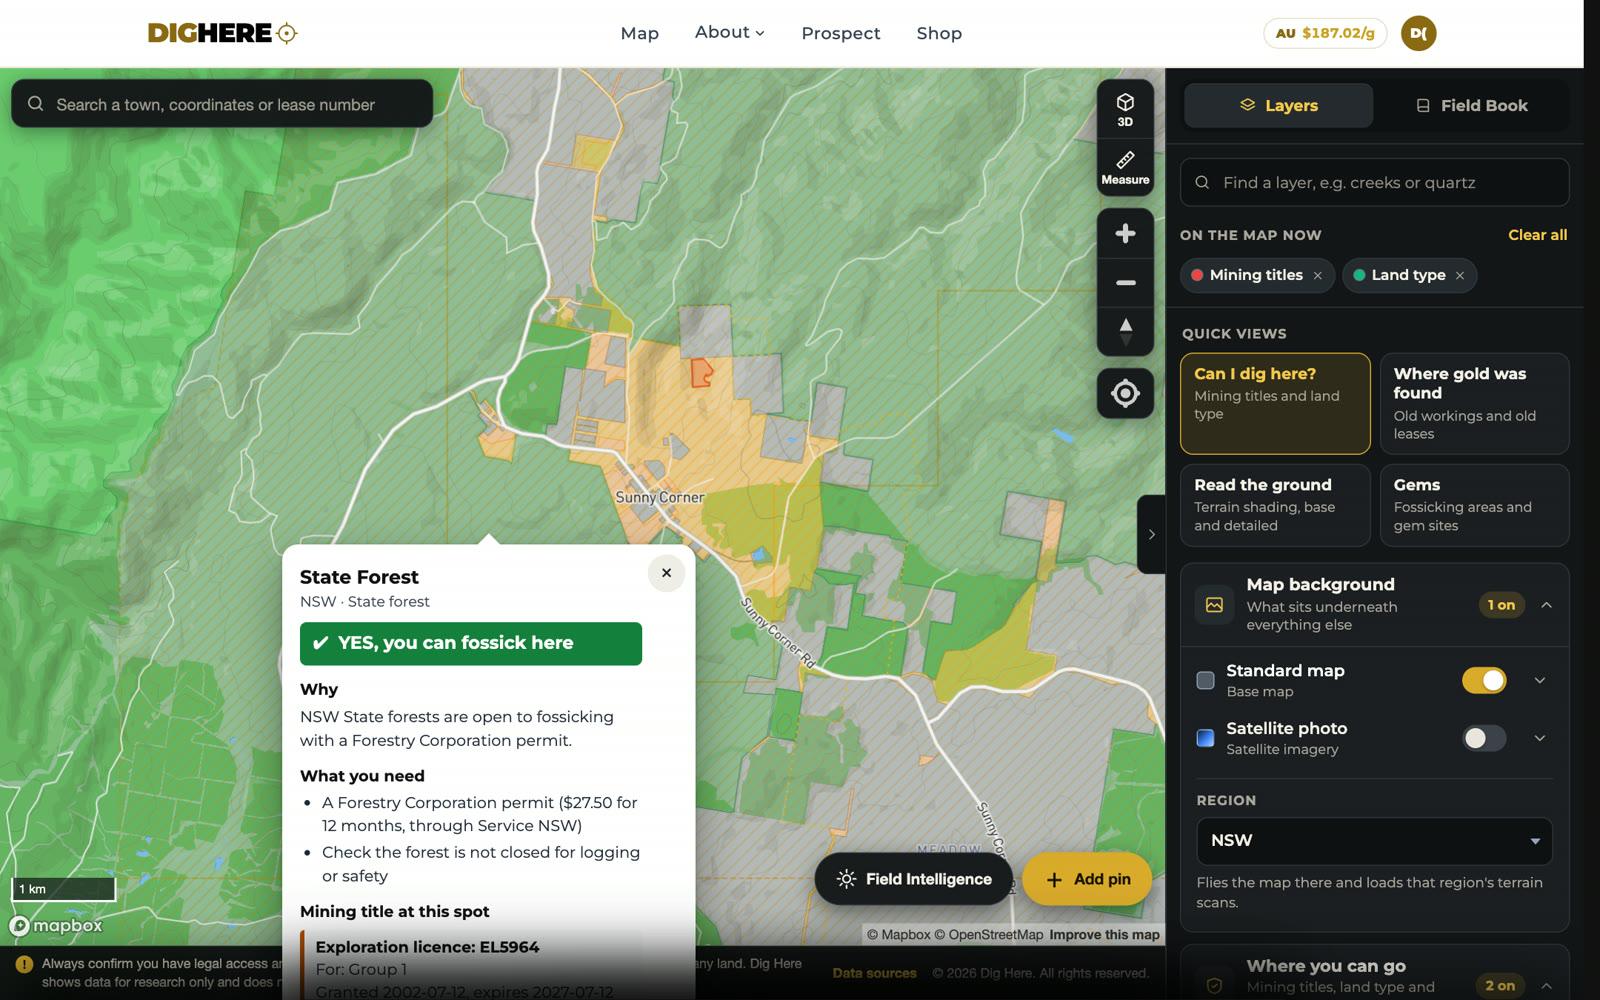
The rules are different in every state. Our guide to fossicking licences in every state covers what you need.
What is new about the map
All of these layers were on the old map. The trouble was finding them. The new look is about making the map easy to use, especially if you are new to it.
- Start with a question. Four quick views (Can I dig here?, Where gold was found, Read the ground, and Gems) switch on the right layers in one tap.
- Plain names. Every layer has a plain name, with the technical name underneath for those who want it.
- See what is on. A list at the top of the panel shows every layer that is switched on, and you can clear them one at a time or all at once.
- Find a layer. Type a word like creeks or quartz and the layer list narrows to match.
- One answer per tap. Tap the map and you get one tidy answer, not a stack of popups.
- Better on a phone. Answers slide up from the bottom of the screen where your thumb is.
Tracks and roads
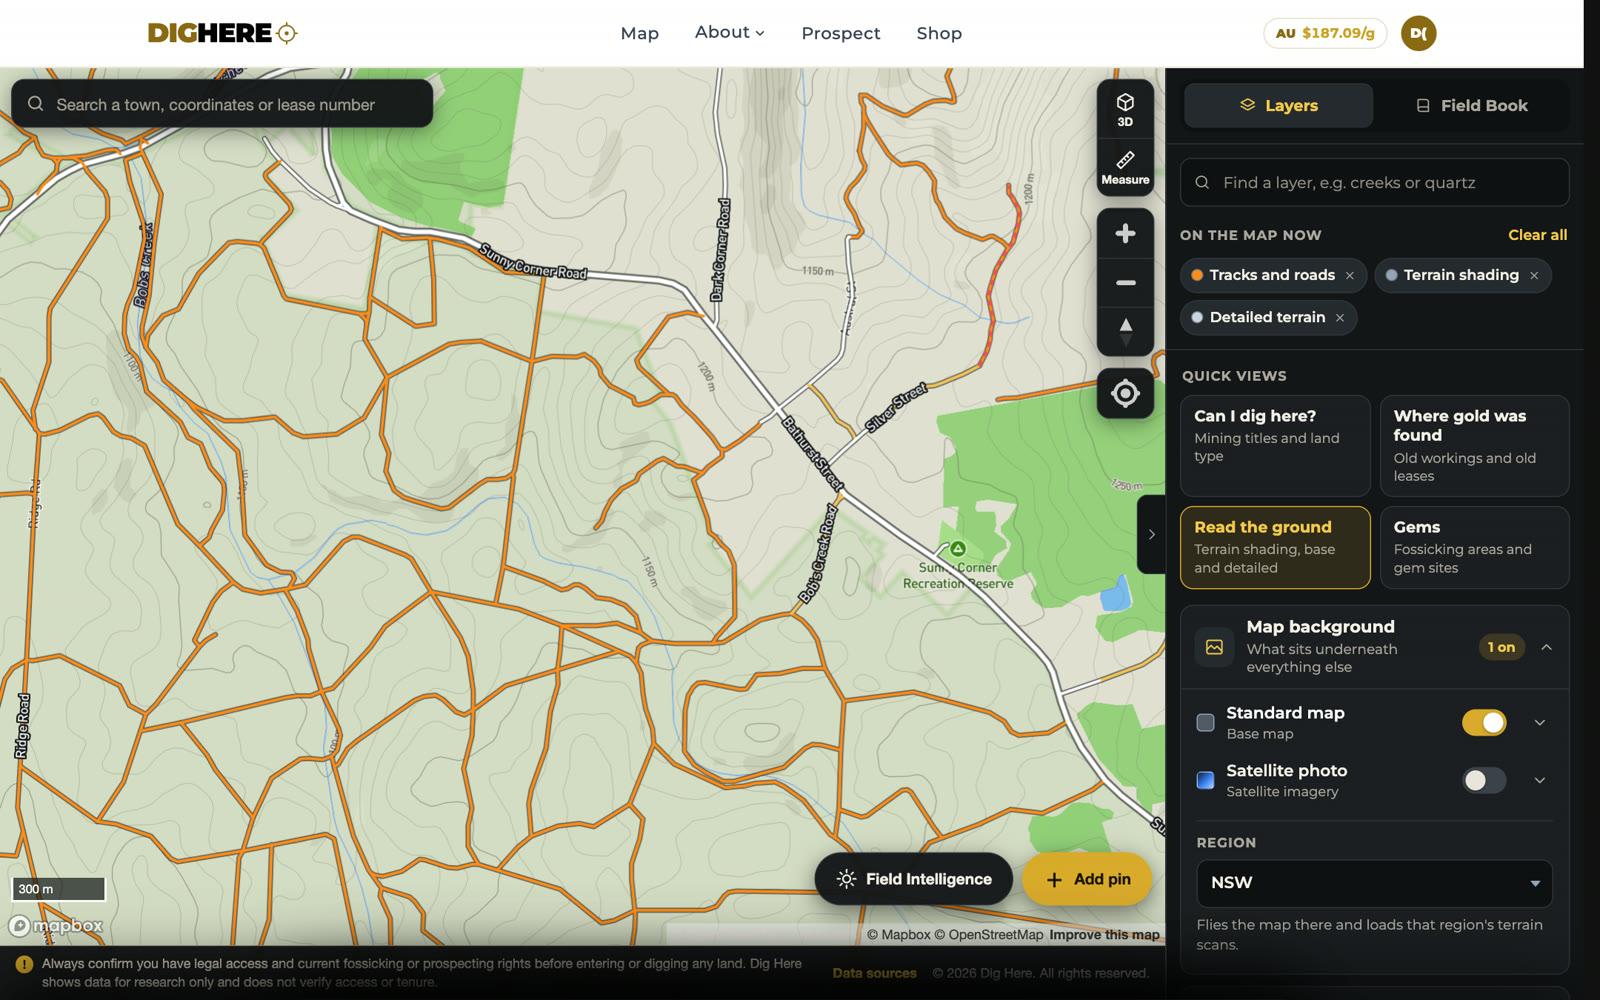
There is a new Tracks and roads layer. It shows sealed and unsealed roads, bush tracks, creek crossings, and tracks marked four-wheel drive only or closed to the public. Getting to the ground is half the job.
Field Intelligence
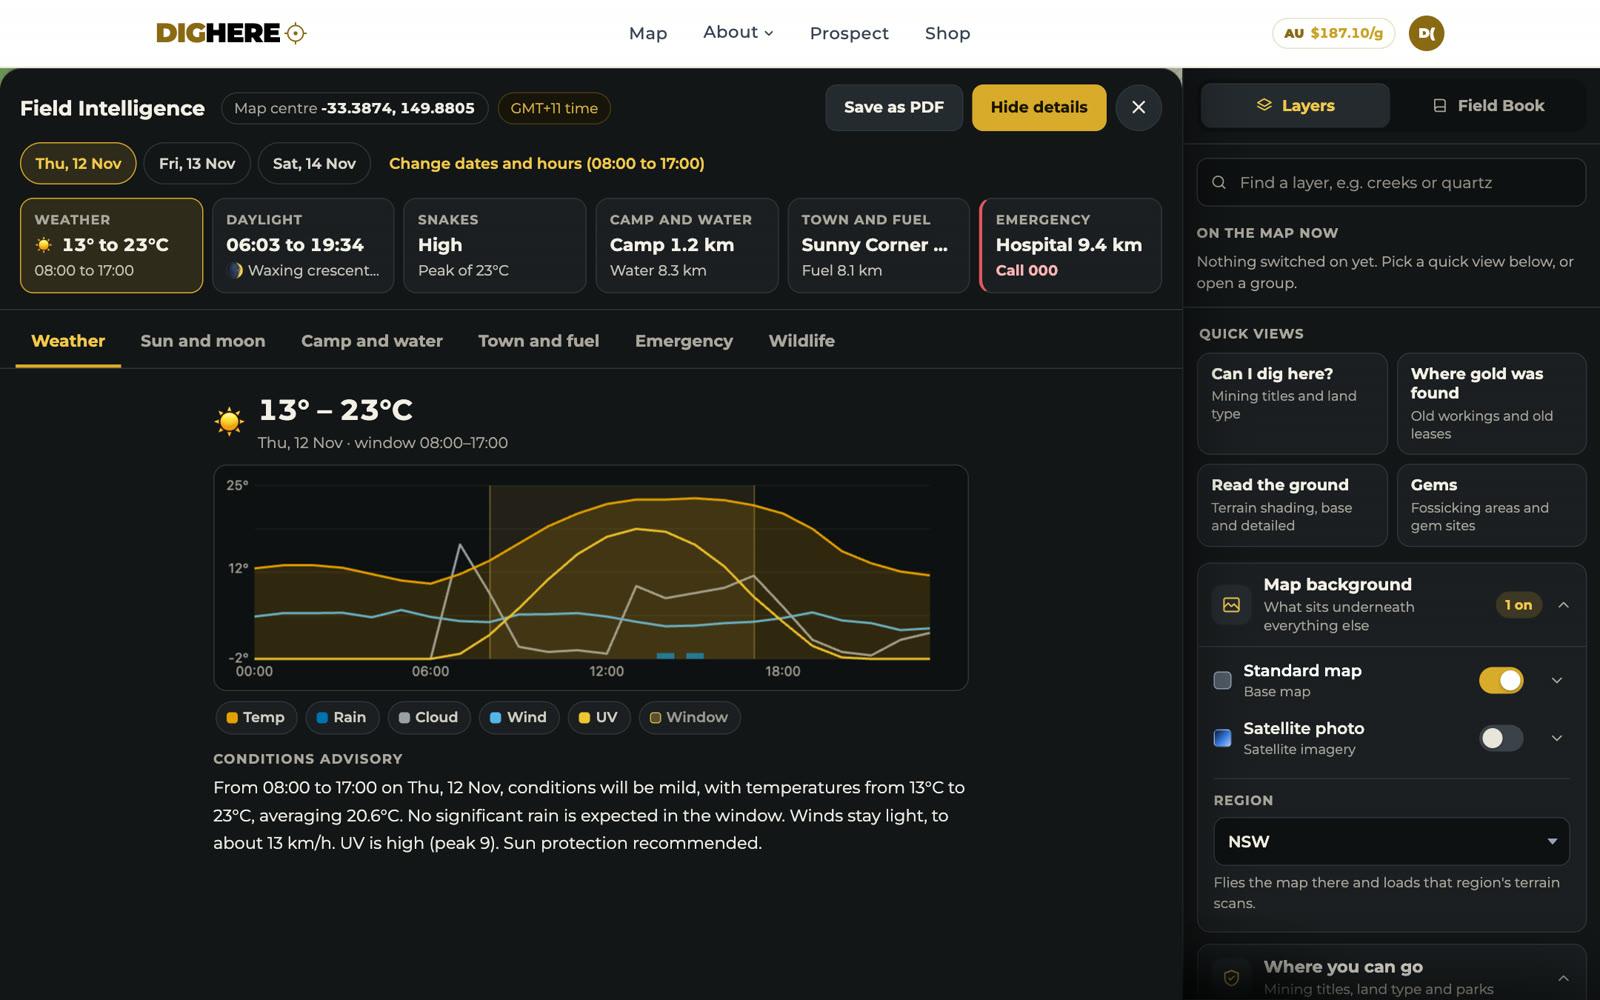
Field Intelligence gives you a trip sheet for any spot on the map: the weather, first and last light, the nearest camp and water, the nearest town and fuel, and the closest hospital and police station. You can save it as a PDF to take with you when there is no signal.
Put it together
- Rock types: find the granite and the ground around its edges.
- Faults: find the cracks, and note which way they run.
- Old workings: see where the old-timers followed them.
- Creeks: follow the water downhill from the workings.
- Terrain: read the gullies, benches and old diggings.
- Tap the map: check you can dig there before you go.
None of this tells you there is gold at a particular spot. It tells you where the odds are better, which is all prospecting has ever been. The rest is boots, patience and filling in your holes.